


This document describes how to create workflows with drag and drop forms.
Step 1: Gather information for a workflow and login into uKnowva account as admin.
Step 2: In the left side menu option click on “List Workflows”.

Step 3: Click on “Add” to create a new workflow.
Step 4: Click on Workflow Setting and add the “Title” of the workflow and required necessary information.
Step 5: Set up approval and access status for the form.

Step 6: On the next “Form” tab you can see a blank form where components can be dragged and dropped.
(In case you don’t see this tab add extension locally or contact uKnowva administration)

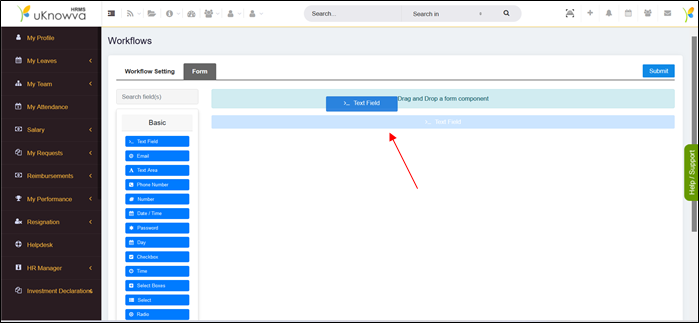
There are four main fields - Basic, Data, Layout and uKnowva Fields. Basic field gives you components needed to grab information like email address, text area, and other components. Data gives you an arrangement of the form for data storage. Layout comprises the form layout and a common uKnowva field like username can be directly dragged on the form.
Step 7: After every component is dragged, click on the wrench logo for edit settings that is visible at the upper left corner when you mouse over.

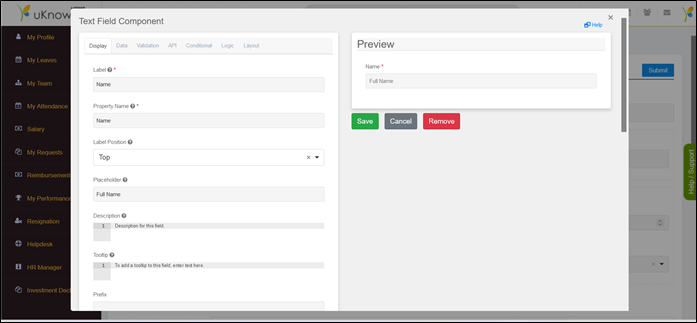
Step 8: Add display settings like its label position and name. Add validation if it is required and how much should be the length of characters/word. A preview is visible on the right. After the required setup, save the component. Similarly, every component has its own setup and can be set as per requirement.
Step 9: To make it compulsory information, click on the validation tab and tick it as required information.
Step 10: Once the form is ready, click on submit at the upper-left, it should be visible in the workflow list menu on successful submission.

Step 11: Execute the workflow from workflow list menu and test information as per form requirements.

On executing, the form will look like as shown below and as designed, fill in the required information and test the approvals.

In case you face any problems, then please write to This email address is being protected from spambots. You need JavaScript enabled to view it., our awesome support team will surely help you!